Screen capture with video editing is among the significant types of processes nowadays, which include making tutorials, making games, webinars’ registration, and sharing clips on social media platforms; iTop Screen Recorder remains a useful and powerful application for Windows users in 2025 with recording and editing options. The present document helps you understand how to use iTop Screen Recorder to record and edit awesome videos on Windows.
Table of Contents
Getting Started with iTop Screen Recorder
Download and Installation

First, get the iTop Screen Recorder from the official site and follow the instructions on how to install it on your PC with Windows. The installation process is quick and straightforward:
After downloading the product, the installer should be performed, and a person should follow the provided instructions.
After installation, click on the launched application to have the best and clearest interface.
To achieve this, the layout of the software is such, that even those who have never recorded voiceovers before can easily do it.
Recording Your Screen
Thanks to the flexibility of iTop Screen Recorder, you can choose available modes and settings for recording. Follow these steps to record your screen efficiently:
Choosing the Recording Mode
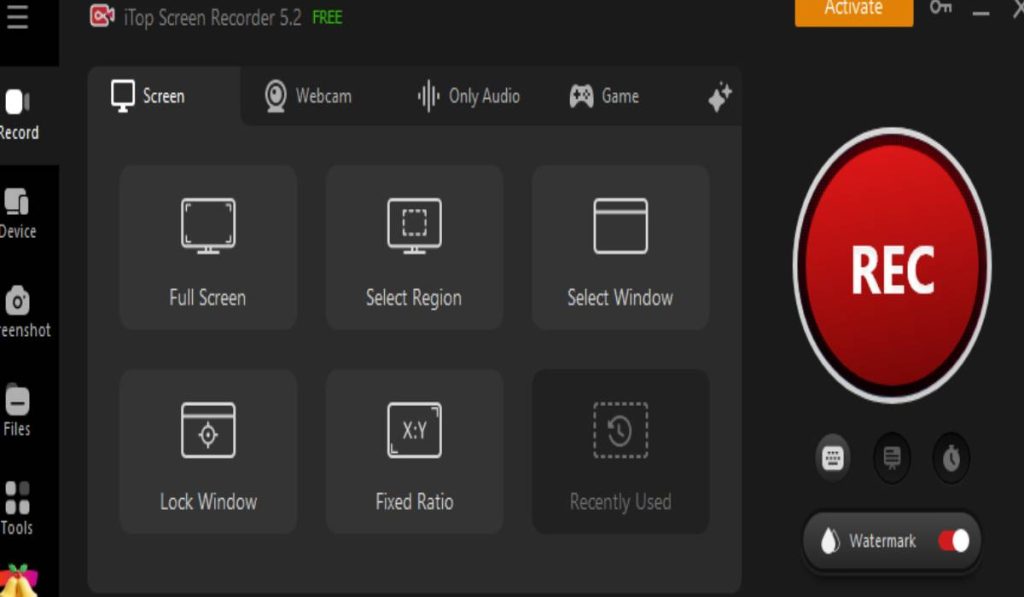
- Full Screen: Capture the entire screen for use in webinars, presentations, or generally.
- Selected Area: Right-click and pick a region of your screen to capture only a specific part of the computer screen.
- Window Mode: Save an individual window to use in various tutorials or when demoing an application.
These flexible choices allow you to set the recording area according to your specifications.
Configuring Audio and Webcam Settings
Before you start recording, configure the audio and webcam settings:
- Audio Options: Record what you hear through your speakers, what you say into the microphone, or both at once.
- Webcam Integration: Turn on the webcam option to show a face over the video stream and record lessons, tutorials, or presentations with flair.
Adjusting Advanced Settings
To ensure the best recording quality, fine-tune these advanced settings:
- Resolution and Frame Rate: Capture videos in up to 4K with options of frame rates up to 120fps for great motion quality.
- Annotations: The type of annotation to use can be drawn, highlighted, or even have text placed on it during the actual recording.
Starting the Recording
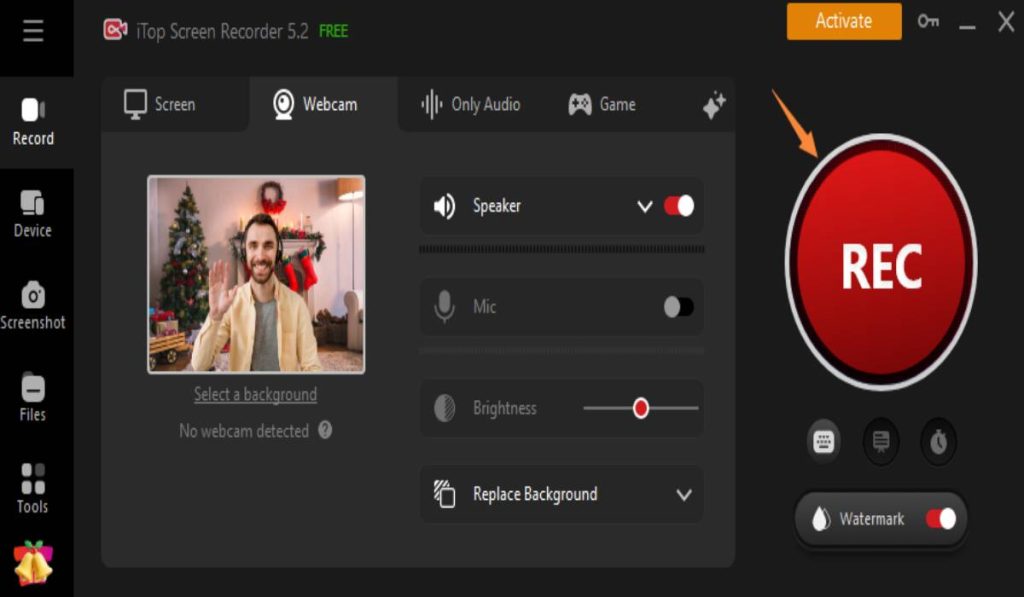
To start, press the Record button.
The recording can be paused, resumed, or stopped using shortcut keys without stopping the proceedings.
Editing Your Videos with iTop Screen Recorder
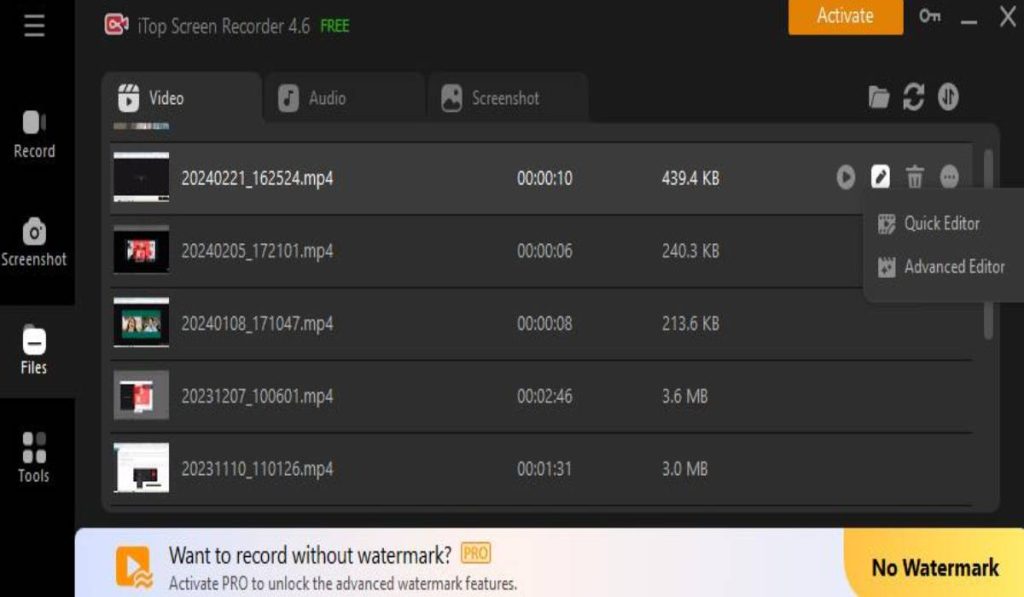
You may also edit your video after the recording by using the in-built video editing tool. The concept of the editing interface is to offer easy and quick working steps and it contains the basic and additional tools.
Importing Your Video
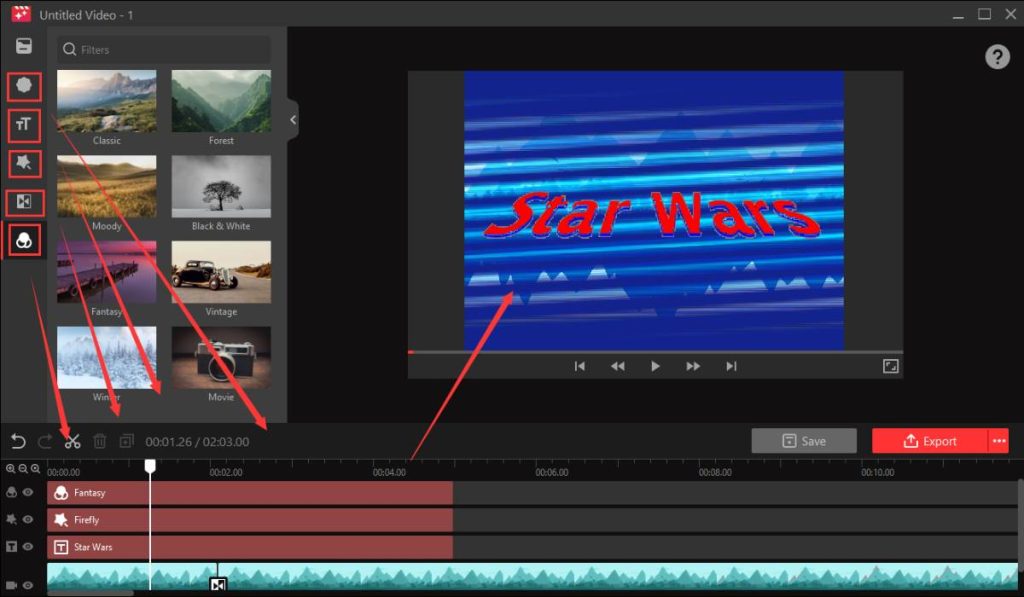
Go to the tape-like tab labeled “Video Editing” then capture the recorded file or any other addition necessary. This editor is user-friendly through its feature, which allows the user to drag and drop files into the editor.
Trimming and Splitting
The trimming tool helps to cut unwanted portions at the initial or final of the video. For more precise edits:
- Split the video into smaller segments.
- Add or delete parts to clarify the narrative.
This helps to give your final output that is fairly well-condensed and yet provocative.
Adding Text, Subtitles, and Annotations
Enhance your video by including textual elements:
- Text Overlays: Add titles, captions, or on-screen instructions to clarify content or emphasize key points.
- Subtitles: Subtitles can be added for better understanding or for other language-speaking people and options of font, size, and color can be set here.
Applying Visual Effects
Make your video visually appealing by applying filters and transitions:
- Filters: Option for filters from the library to set the mood or support the general view of the video.
- Transitions: Edit footage in a professional way by using fade-ins, slides, or wipes to make a shift from one clip to the next.
Enhancing Audio
iTop Screen Recorder’s audio tools allow you to refine sound quality:
- Background Music: Select an appropriate video clip from the integrated media list or find your own.
- Voiceover: Record a narration directly for the editor to superimpose when you are through with your illustrations.
- Volume Adjustment: Admix audio so that speech can be heard clearly.
Advanced Editing Features
For more complex projects, take advantage of advanced tools:
- Multi-layer Editing: They comprise work arrows that have individual layers dedicated to clips’ video, sound, and impacts
- Background Removal: If your video source is a webcam, then use the background remover to replace or blur the background.
- Blurry Footage Fix: Improve the overall sound quality in any recording which may have poor sound quality by applying sharpening techniques from an artificial neural network.
Exporting Your Video
When your video is complete, use iTop Screen Recorder’s customized export settings to save your video output. Follow these steps to finalize and share your work:
Selecting Export Options
Choose the output format: MP4, AVI, MOV, and more.
Use the settings to fine-tune the video with lesser quality like lower resolution and lesser frame rates and vice versa with lesser video bit rates.
File Compression
Try the provided compression utility to optimize the amount of data lossless by a few times, which will make it easy to share files on the Internet.
Direct Sharing
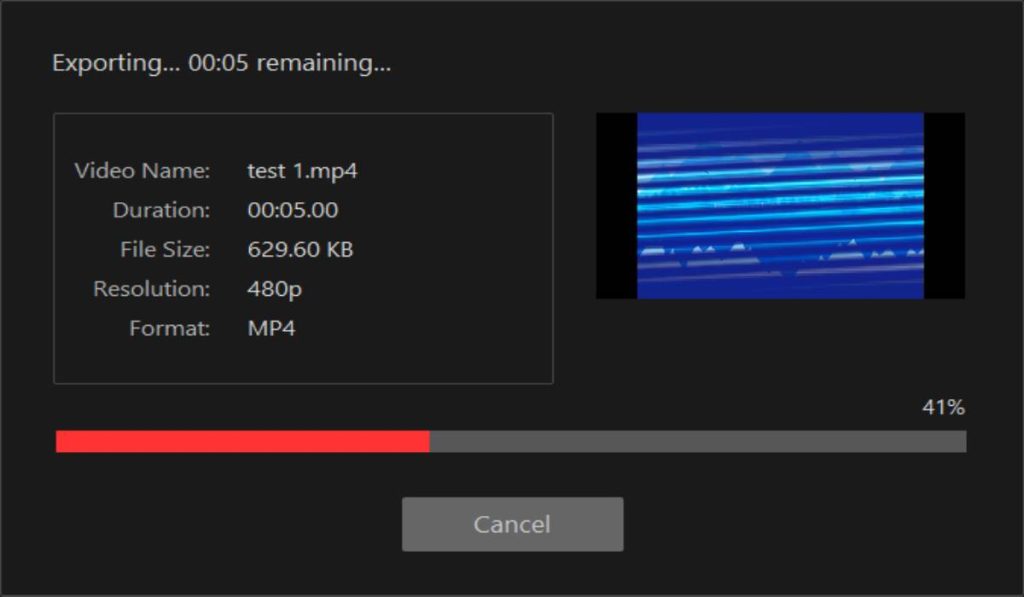
Recorded videos in iTop Screen Recorder can be directly shared on YouTube, Vimeo, and Google Drive. It is also possible to save the file locally for subsequent use.
Tips for Effective Screen Recording and Editing
Plan Ahead: In this case, you need to outline your recording goals as well as script some of the key points in order to minimize the number of takes if any at all.
Maintain Clarity: Select high resolution of your videos to produce high-quality and professional videos.
Keep It Concise: Whatever is possible should be avoided to make the viewers lose interest in the show by extending it for far too long in a single sitting.
Experiment with Effects: Add filters and transitions sparingly to enhance visuals without overwhelming the content.
Test Audio: The audio level should be checked and altered most of the time to ensure continuity.
Conclusion
In 2025, iTop Screen Recorder becomes the multitalented tool to capture screens and perform video editor functions on the Windows OS. Because of those unique characteristics, it is advisable for businesspersons, educators, game lovers, and developers. However, by following this guide, you can capture and edit videos easily, and start being creative with videos now.

